This procedure describes how to change the Media Sensor sensitivity via the touch panel on the cutter.
Before executing the procedure, clean both media sensors, as they can be covered by dust, reducing the ability to detect the media.
Do the sensor calibration with a pinch roller assembly above the rear sensor and a piece of media with good reflecting backing. In case there is a problem with a certain type of media (e.g. with black backing) then use this media, however check it afterwards again with media with normal backing.
To change the sensitivity, follow the next steps:
1. Power on the cutter.
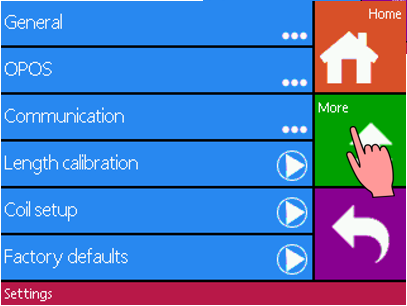
2. Press “Settings”.
3. Press “More” two times to get to the last page.
4. Press "media sensor setup".
5. Select which sensor to adjust. Press either “Back sensor” or “Front sensor”.
6. Put a piece of media half on the chosen sensor and under the two outer pinch rollers. Lower the pinch rollers.
Press

to start the test. The machine while move the media forwards and backwards to cover and uncover the media sensor, while displaying the reflection of the backing in a bar graph.
7. There are five levels of sensitivity to choose from.
Use 

to change the sensitivity level.
After choosing a sensitivity level, there will be a rectangle next to the sensitivity. When the sensor is covered then the rectangle will be (completely) filled with white stripes. When the senor is uncovered, there will be (almost) no white stripes in the rectangle.
 |  |
Sensor uncovered | Sensor covered |
The blue stripe in the rectangle is the trigger level at which the cutter decides whether there is media in the machine or not.
8. Use

and

to change the trigger level if necessary.
Ideally there would be no white stripes when the sensor is uncovered, the rectangle is completely filled when it is covered, and the trigger level is set in the middle.
9. Click “Apply” to confirm.
10. Repeat from step 4 for the other sensor.
Was this article helpful?
That’s Great!
Thank you for your feedback
Sorry! We couldn't be helpful
Thank you for your feedback
Feedback sent
We appreciate your effort and will try to fix the article